UPDATE: All new featured RV tours will be posted on my other website, Wanderful RV Interiors. Existing tours will slowly be moved to the new website, and anything already moved will automatically redirect.
Disclaimer: This post may contain affiliate links, meaning, if you click through and make a purchase we (or those featured in this post) may earn a commission at no additional cost to you. View our full-disclosure here.
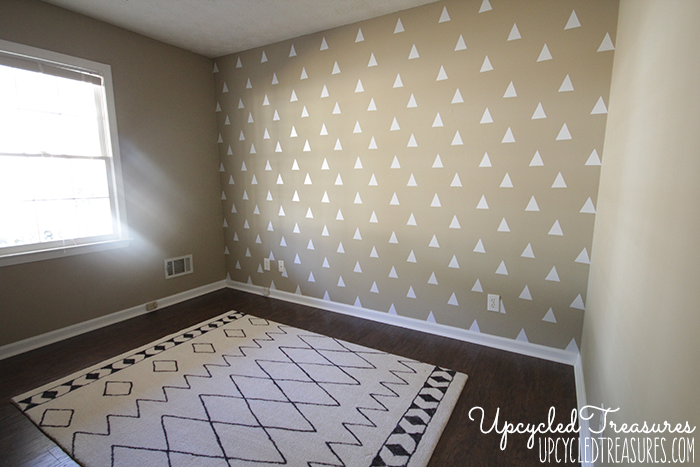
Don’t you just love area rugs? They can dramatically change a space and add so much character, but unfortunately they can also come with a hefty price tag. Now that I have a new {home} office to decorate I have been obsessing over rugs to find the perfect one for my new creative space.
Of course, being on a super tight budget also means I have to get “crafty” to create the space I’m dreaming of. Lucky for me, being cheap crafty, helped inspire this DIY sharpie rug!
DIY Sharpie Rug
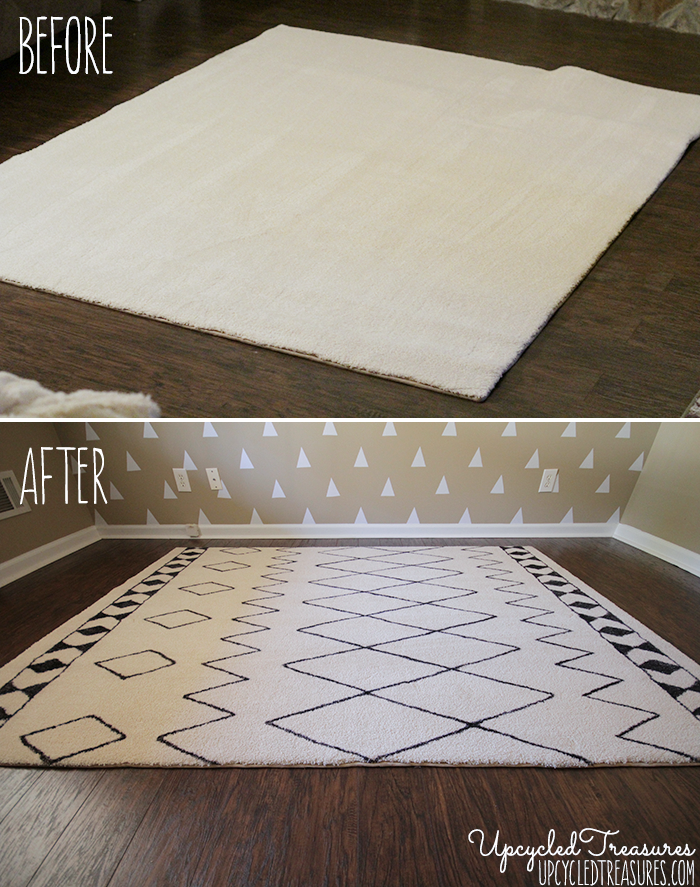
If you follow me on instagram you may remember this photo I posted a couple weeks ago of an ivory colored 5×7 rug I found at Lowes for $25!
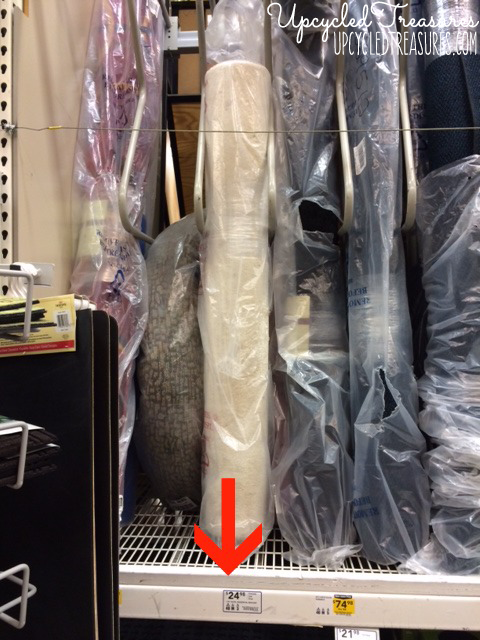
I was actually so excited about the price that I tried to pick the rug up right then and there {I was there to pick up a doorknob and didn’t grab a cart}. Um yeah that didn’t happen, haha. Do you ever get so excited about something you get all mama bear and try to grab it as quick as possible, sometimes forgetting to calculate weight or your own strength? I especially get like this at thrift stores, like with my wood shim art. Haha.
Anyway, I wanted to check with a Lowes employee on the price before grabbing a cart but was scared to walk 10 steps away since some other guy was casually walking down the aisle. He didn’t seem the least bit interested in my rug, but I was all concerned anyway and must have looked extra crazy. Long story short the price was right so I snagged it right up {with the help of the cart}, woo-hoo!
My original intention was to paint a rug but I hadn’t decided on a color or pattern yet, although I did pick up some textile paint to mix with whatever color I would eventually pick. I have wanted to paint a rug for nearly 2 years now but apartment living and lack of space made me put it on hold. The wait was worth it though, because I am in LOVE with my new DIY rug! Funny how I actually didn’t even use paint on this rug, instead I used a sharpie. Well, 2 sharpies to be exact.
Note: Although I used actual sharpie markers, I recommend using Sharpie PAINT markers.

After scouring the web and pinning dozens of ideas to a secret pinterest board, I finally decided the rug I loved most was the Kasbah rug from West Elm, but at $500? Yowzers! I’m sure it’s way more comfy than my rug but that’s okay, I’ll save the $475 and make my own.
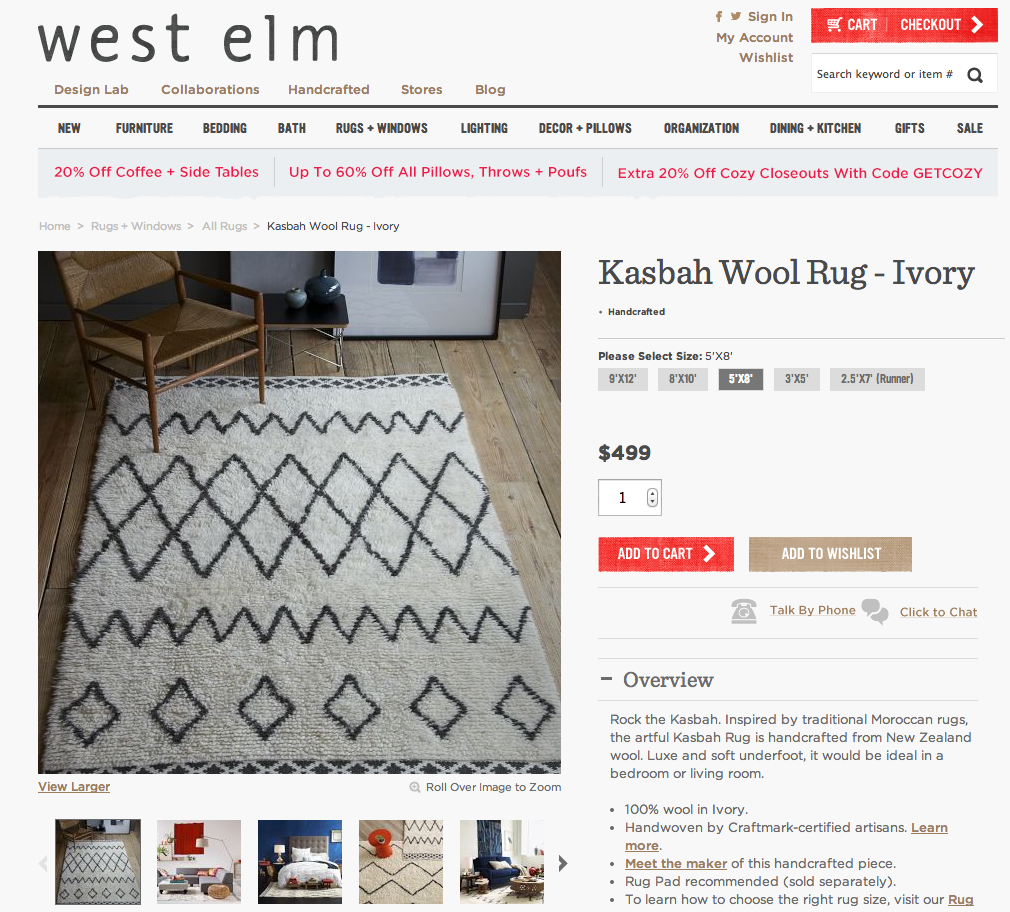
I thought I was going to choose a more colorful rug to mimic, but honestly this is the rug I couldn’t stop thinking about. Funny how that happens. Plus it looked to be a bit forgiving and seemed like It was something that wouldn’t be too difficult for my first attempt at a DIY rug. Being that it was black and ivory I figured a sharpie would probably be a lot easier to use vs black paint, so I decided to go that route instead.
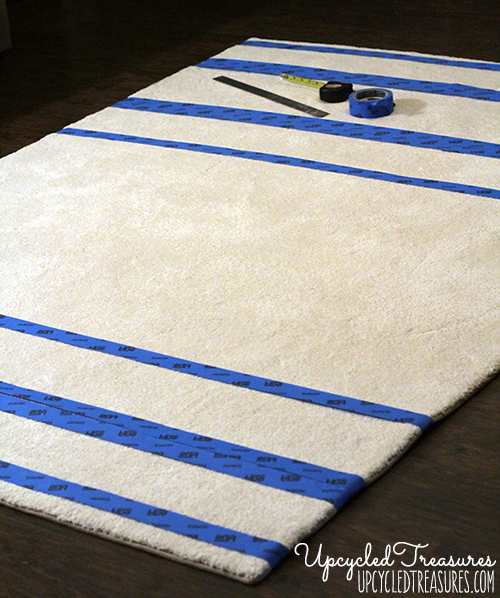
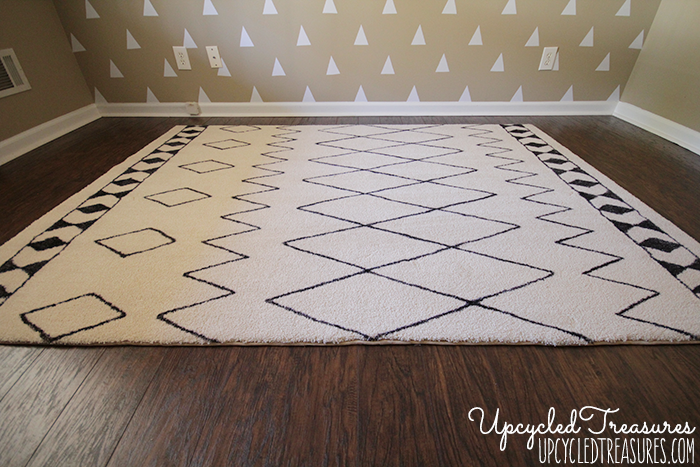
The first thing I did was unroll the carpet and give it a good vacuuming, you can see a bit of a kink in the photo below, but now that it’s been rolled out for a few days that’s gone away.
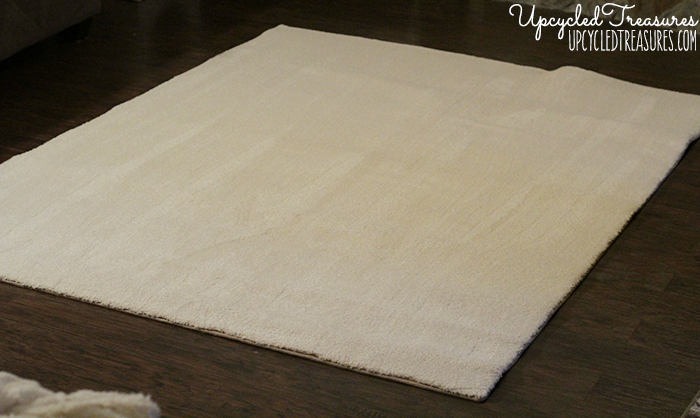
This is going to seem kinda silly but there was a black mark on the upper left side of the carpet so I figured I would try to space everything out to work that into the design, and that’s exactly what I did. Of course, an hour later Eric had the brilliant idea of cleaning the spot to see if it would come out… and it did. I guess that’s what happens when you start planning a DIY rug design at 2am after a couple of drinks, oh well.

Materials Needed for DIY Sharpie Rug:
- 5×7 Rug
- Measuring Tape
- Ruler
- Sharpie Markers or Sharpie PAINT markers
- Painters Tape
- Cardboard Cutouts of shapes to trace
I made marks on the carpet with my finger to help with the space planning, which you can kinda see in the photo below. I then drew up an absolutely awful plan that showed my measurements of where my designs would go to help me get the tape in place. Let me also just say that I am AWFUL at math, it’s definitely not my strong suite. I want to be friends with it but we have a bit of a love-hate relationship. I’m working on it though. With that said, if I can do this, anyone can do this! Please excuse some of the bad phone photos in this post.
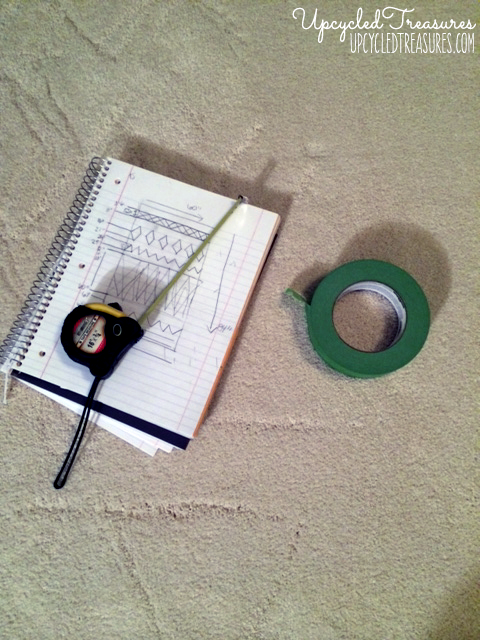
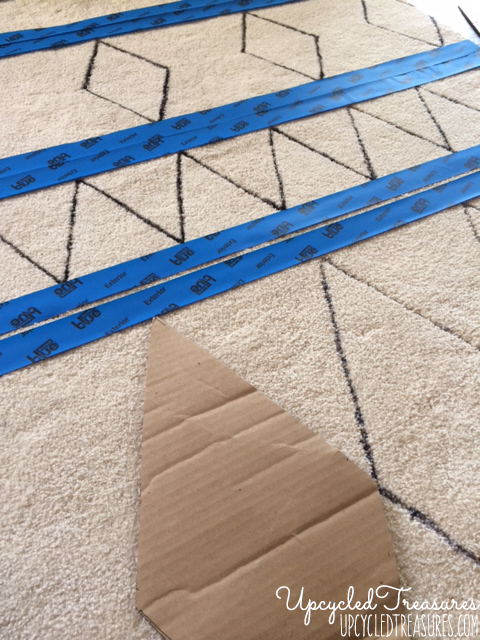
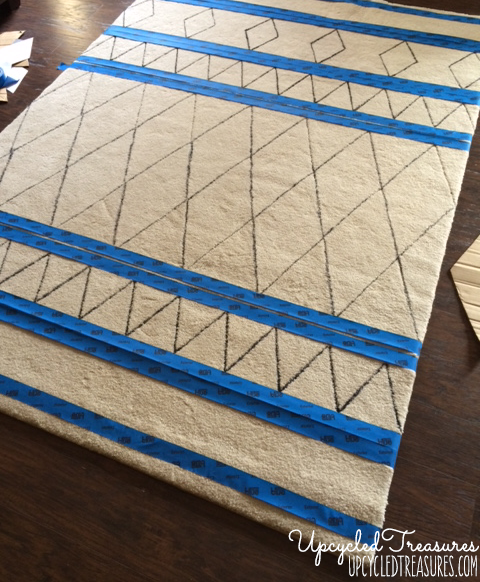
I started off using green tape because I heard that was the best kind to use when painting rugs, however it wasn’t sticking to mine very well. It could be that this wasn’t a flat woven rug but I had some scotch blue exterior tape on hand (that I got free from the Haven conference), and although it’s for exteriors it worked surprisingly well.
Here is the rug almost completely taped off:
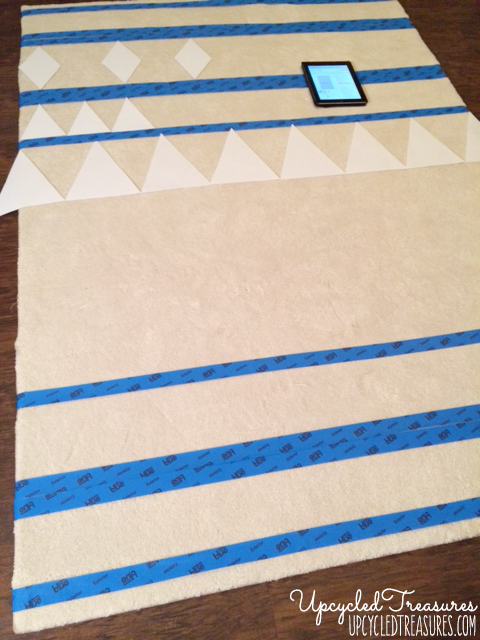
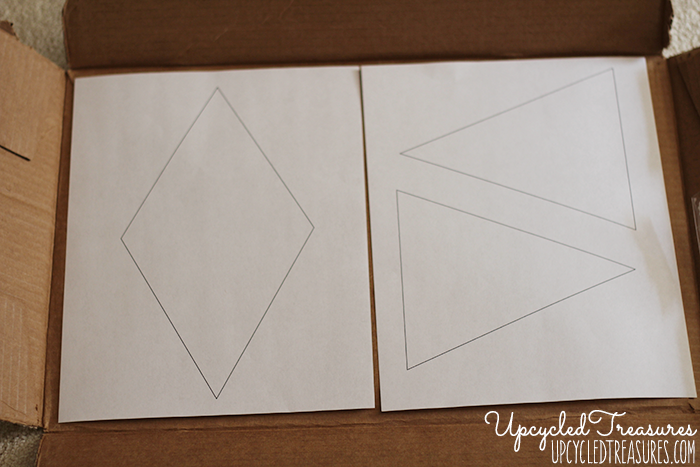
I decided to print out some shapes to test how they would look on the rug and to help me determine what size and how many to use. I probably spent more time on this than is necessary since it was easier for me than doing some math equations, plus I’m more visual.
Here is a photo showing some cutouts with the inspiration rug pulled up on the iPad.
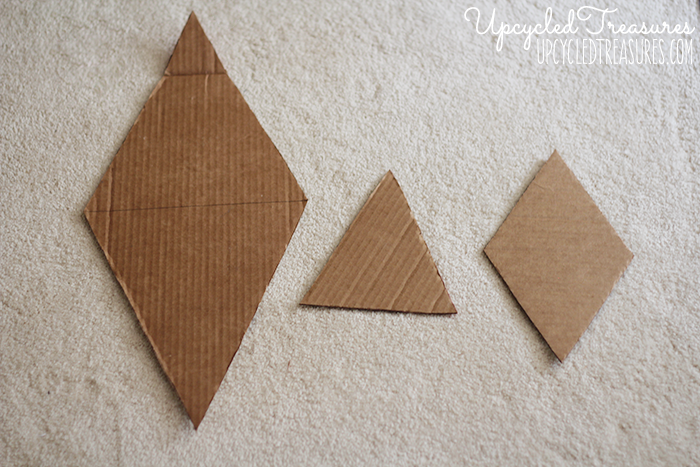
Once I had the shape sizes where I liked them I created cardboard cutouts. Luckily we have lots of cardboard boxes since we just moved.
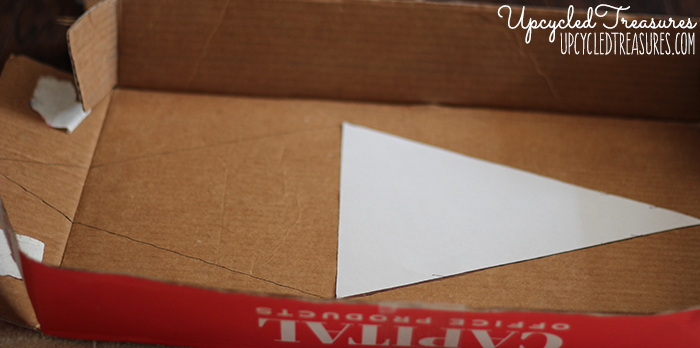
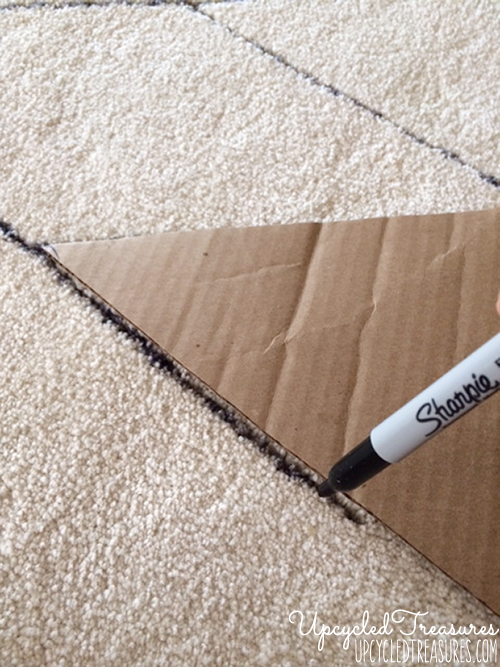
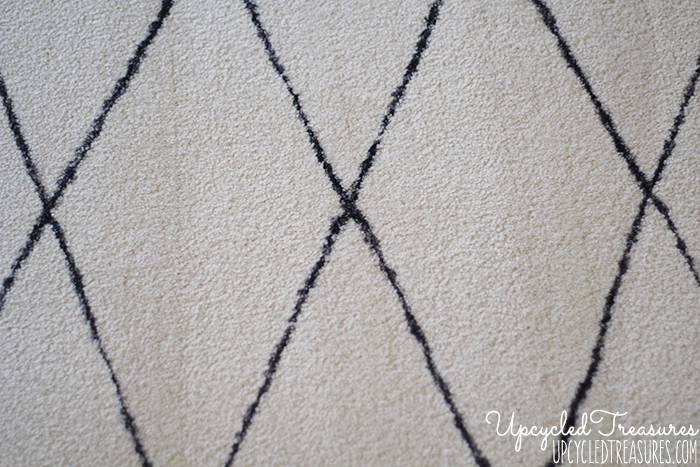
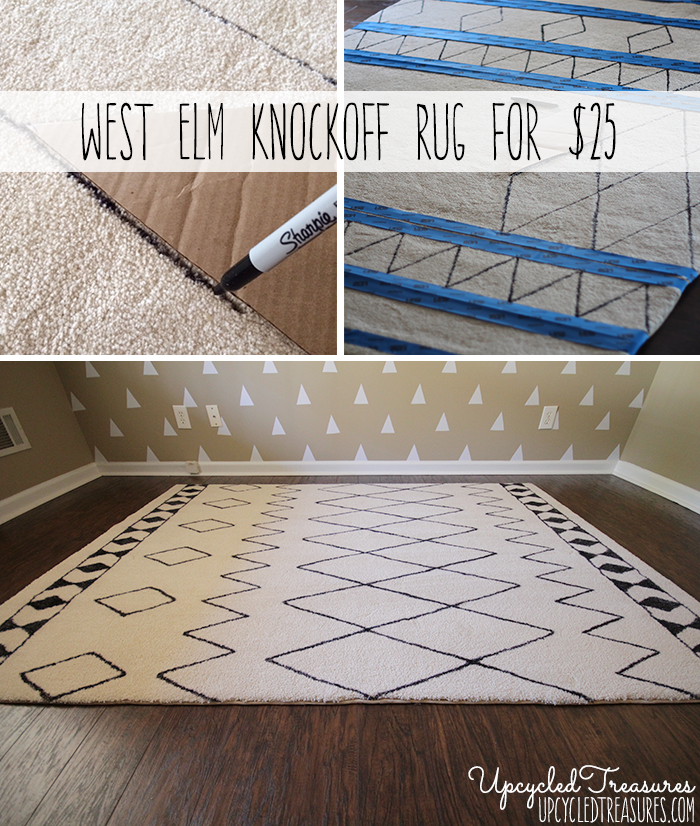
Afterwards, I started using my cardboard templates to go around the rug one section at a time. I traced the outside with a sharpie marker, making sure to smoosh it into the rug and going up and down to get the color into the rug. Talk about instant gratification!

You may have seen the photo below on instagram over the weekend:
I slowly moved to each section and was surprised how easy it all was, despite the whole process being quite time consuming.
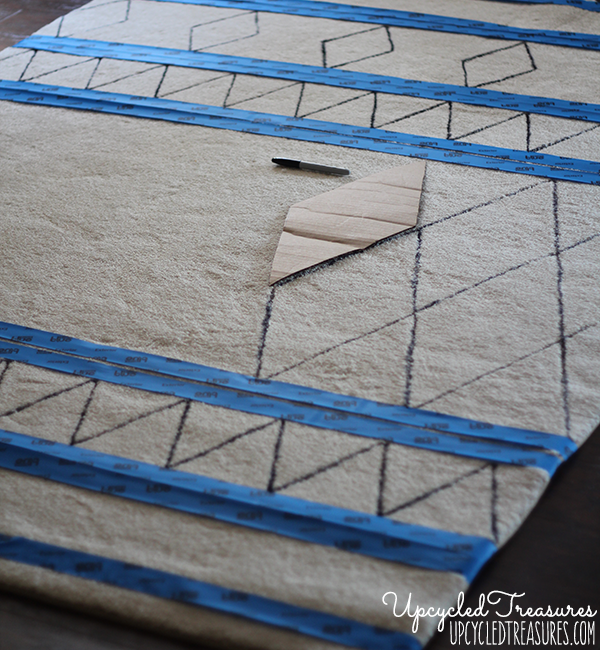
I decided to do the side borders last because I wanted to change it up a bit from the West Elm version.
I cut out some little triangles to decide how I wanted the pattern to look, and then created a cardboard cutout.
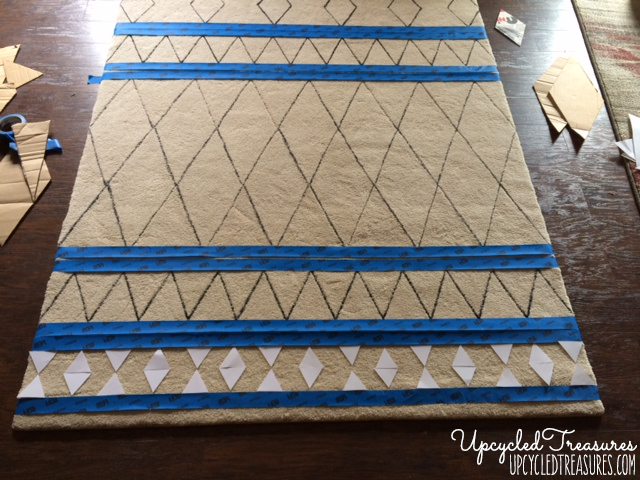
Okay I have to admit that I actually really like the way the pattern looked at this point but decided to color the shapes in to give it more weight. I’m kicking myself for that now because I prefer the lines. Live and learn, right? Ugh.
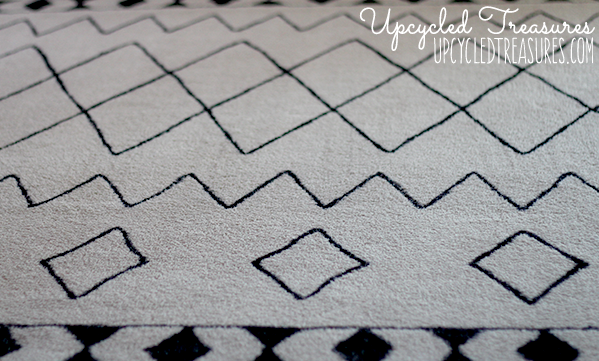
The photo below shows the border shapes filled in, at which point I really wish I could have hit control z and gone back a step, ha.

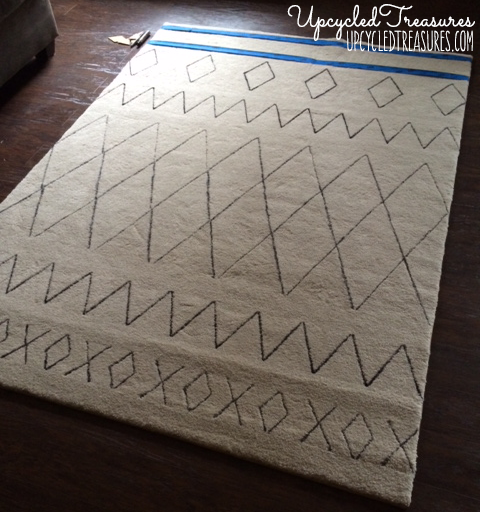
I wasn’t too thrilled about the way the borders looked and decided to add lines to the edges. 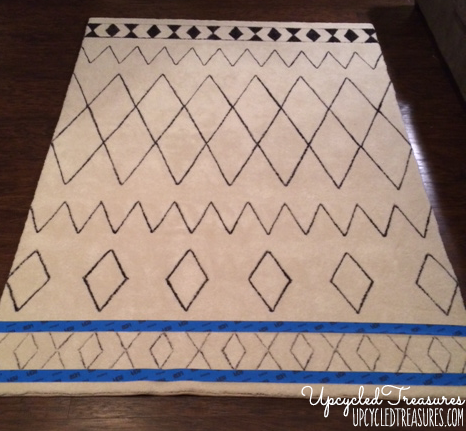
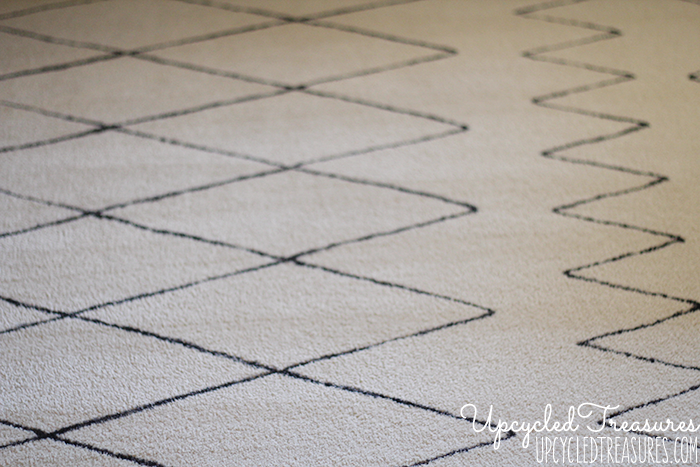
I then went over the lines a second time with the sharpie to make them a little darker and thicker. Then a couple days later I decided to go over the lines one more time to make them just a tad thicker. I used 2 sharpies in all, both of which I have had for a while and there were a couple times I took breaks to give them a rest before going back. Not too shabby. However, I think sharpie paint pens would have worked better and would last longer.
And here is my DIY sharpie rug all finished!

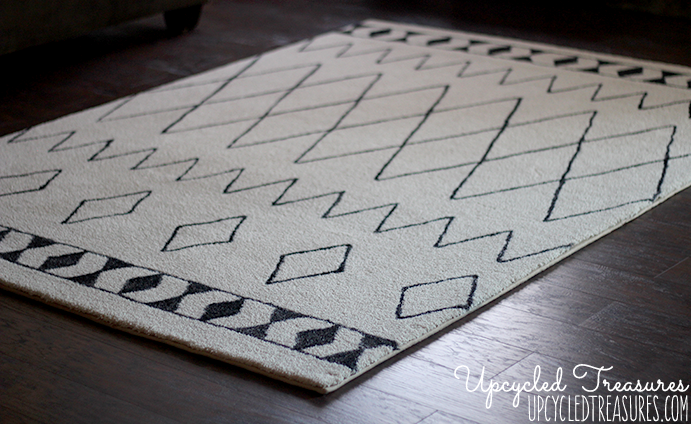
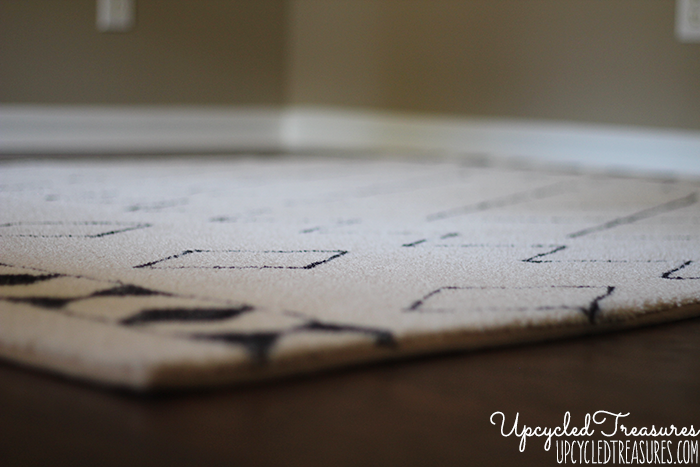
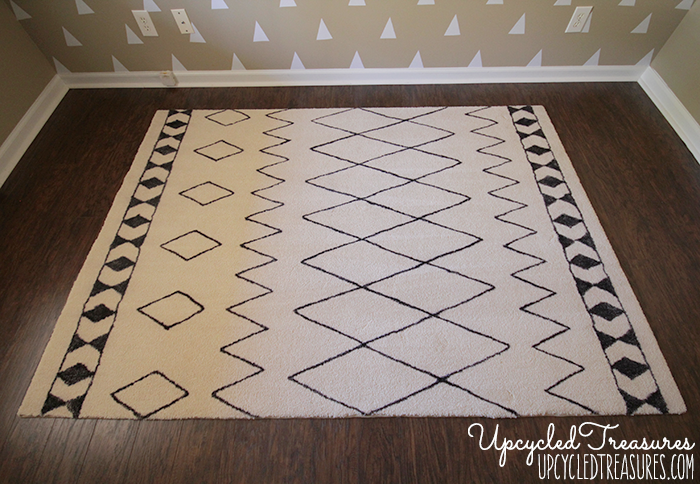

I will have to update you on how it holds up, but can say that it feels just as soft as when I bought it and I have even vacuumed it a couple times already with no issues. So what do you think of our DIY sharpie rug?
Have you made a DIY sharpie rug before or do you plan to make one after seeing this post? Even though this project was time consuming I am over the moon about my new DIY sharpie rug, and definitely see more DIY rugs in my future!
Update: This rug has since been moved into our living room because we love it so much! I am also happy to report that it is holding up really well, best of all, the carpet is still SUPER soft. Since it’s now in a high traffic area I felt like it faded a bit after about 10 months so I did go over the lines with a sharpie while watching an episode of Property Brothers. I probably should have used a sharpie paint marker, and may try that in the future.
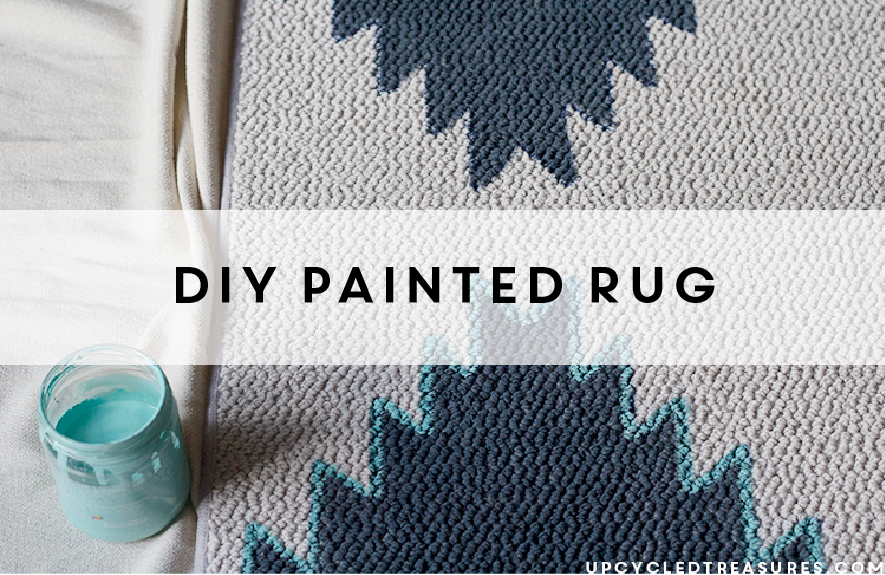
You may also want to check out my DIY Painted Rug:
SPOT. ON. I honestly like yours better. This is amazing!!
Thanks Amy! I am amazed every time I see it and still can’t believe it was just a sharpie marker. It looks even better with my new desk on it, which I will be sharing next week 🙂
I’m with Amy! I totally prefer yours. Step aside, West Elm. There’s a new home decor sheriff in town! 😉
This totally rocks! Way to go. I love it
Thanks Amy! I am loving it too and can’t wait to have the rest of my office done. I’m sooooo impatient, but I have to remember it’s going to take time 🙂
I recently took over our spare bedroom as my art studio, and I have been scouring everywhere for a rug to add some pretty factor (but on the cheap!) I think I may have to trek over to Lowes today! I love your rug.
Thanks Andrea! I definitely recommend this as an affordable option. I couldn’t decide if I wanted to make my lines thicker so I figured I would wait a couple days and see if I still wanted to change it. I went over the lines again today and now I love it even more! The fact that I was able to lay on the carpet and basically draw on it is still beyond me. So easy! I look forward to seeing what you do with your new art studio!
This is so smart! Love it! Awesome knock off 🙂
Thanks Angela!
Amazing! Now that it’s been a while, how is it wearing? Do the lines remain straight when you vaccum?
So far so good! I actually spilled a little coffee on it a couple days ago {seriously!haha} and did a little spot cleaning and it came out great. It’s in my office which isn’t a super high traffic area but the pets have been laying on it so I have already vacuumed it a few times. The lines are straighter when I vacuum and they get a little wavy after a while {like in the West Elm photo} but I actually like them that way too 🙂
Your rug looks terrific – great job!!!
Thank you!
Great idea! Pinned!
Thanks for sharing!
WOW the rug looks beautiful. Simple yet beautiful.
Thank you so much Anam, I can’t wait to have my entire office pulled together 🙂
This is fabulous! Seriously…IN LOVE! I did a painted indoor/outdoor rug last year and loved it, but it has started to fade. I wonder if this method would fade over time? Either way, who cares for $25, right? Gorgeous girl!
I originally planned on painting a rug and was feeling good after seeing so many inspiring tutorials, but in the end the sharpie seemed like the easier {and lazier haha} way to do this specific rug design. I guess I will find out if it fades over time and will keep you posted 🙂 It’s in my office which doesn’t get a ton of traffic though.
The really nice thing about using a “Sharpie”, is you can always touch-up any part of the rug, if and when necessary.
The only part of the design that kind of bothers me, is the “original designer” seems to have left out a row of small diamonds, which gives the overall lay-out, an asymmetrical look. Although, in all fairness, this may have been what the designer was trying to achieve. I’m sure it’s probably just me. I have a “thing” about balance, in what appears would be a repeating design pattern.
Your idea of using a “Sharpie” was great!
I have even used sharpies to touch-up minor scratches on my black car. Also great for fixing a scratch on a black leather boot, jacket or even a black leather couch. Although, you have to be rather careful when doing it. The plus is, it actually seems to lasts fairly well.
Finally, your DIY approach to this project is really great. I suppose this is just common practice for you.
You’ll have to forgive, this is the first time for me, reading your blog. So I haven’t had the privilege of reading any of your earlier posts.
Thanks Alot,
Jim Dasher
Wow!! Your rug looks awesome – what a great idea!!
Thank you so much Cher!
Genius! I love a good $475 savings & I would never know that this was Sharpie. Thanks for linking this to Thursday S.T.Y.L.E.!
I know right, that’s my kind of discount! Haha. It doesn’t look like a sharpie in person either, I LOVE it! Thanks for stopping by!
This is fabulous! And I like the ‘filled in shapes’ 🙂 I think they add nice weight to the pattern. And $25!! Amazing 🙂 I’ve been on the hunt for a neutral 6×9 rug for our rec room with no luck so far…but when I find one, this might be just the ticket! Erin
Thanks Erin! I wasn’t so sure about the filled in parts or lines next to them, but once I went over the lines with a sharpie for the 3rd time I really liked it. The possibilities are endless and if you decide to make one I’d love to see it!
Wow, this is a great project! And maybe just what I was looking for. I want a rug for my dining room but not at $700 which is what I was looking at. The color is the most important thing because my DR is a very light pink and I want it to coordinate with that. I will definitely check for a solid color carpet remnant and try it.
Very creative of you!
Sounds like a great idea! Now I want to play around with colored sharpies and was thinking of testing out white on a colored rug. I’ve never used white sharpies so it will be interesting to see if that works. Thanks for stopping by!
West Elm Rug Knock Off buddies! I just finished one up myself for the Torres Kilim. I really like how yours turned out. For $25 i could totally DIY another rug in the near future!
Ive followed you on your social media. Leaving an open invitation to follow back. I think wed make good friends!
Yay, I’m off to check out yours and follow you too! I definitely want to DIY some other rugs for our house. For the price and the outcome, you can’t beat it 🙂
that is insane, and awesome, and spot on. let us know how it holds up to traffic.
Thank you! It’s not in a super high traffic area {my office} but so far so good 🙂 I have vacuumed it many times and even spilled coffee {oops} and was able to do a quick spot cleaning no problem.
wow, this is such a fantastic idea!
P.S. I found you through the link party on http://www.linesacross.com/
Thanks Krisi!
Wow! Amazing transformation!
Thank you so much Emily!
WOW that is awesome! great idea!
Thanks!
I love it! Amazing. I pinned it 🙂
Thank you Stacy! So happy you stopped by to check it out 🙂
Haha… some of my best projects are done at 2am after a few drinks. Seriously tho this is AMAZING!! I am in love. GREAT JOB
I couldn’t agree with you more, or at least that makes them a little more fun 🙂
This is such an incredible knockoff!! Wow!!! So impressed Katie- and it looks stunning!! Shared:)
Awww, thank you Krista!
Oh my goodness I’m adding Lowes to my weekend errands see if ours has one that cheap as well! It turned out so fabulous and I actually love how you changed up the design!
Thanks Jodie! Good luck and I’d love to see what you do if you make one!
OMG! You did it again! I love this rug, I mean LOVE! Great job! I like it better than the West Elm.
Thank you so much Heather, it’s definitely one of my favorite projects and I still can’t believe it’s a sharpie! The hubs likes it so much he wanted to move it into the living room but I’ll just have to make another one 🙂
Have a great week!
Hi Kate,
Just wanted to drop in and let you know your West Elm Knockoff Sharpie Rug is one of my features this week on Link it Or Lump It Link Party! Thanks so much for linking up. Come grab a button and link up again! http://www.twoityourself.com/2014/03/link-it-or-lump-it-link-party-27-plus.html#more
Thank you so much Melissa!! I’m all linked up again 🙂
I {really} LOVE this! I’m hosting a Sharpie crafts link party on my blog this week, and I’d love it if you wanted to link up! Favorites will be featured in a compilation post next week, & we’re giving away a $50 Target GC and Sharpie prize pack! http://bit.ly/1c0IEvS
I just can’t get over how amazing this rug is! I’ve seen the Sharpie on a rug approach before and I’m curious how it’s holding up so far. I’d think if it was in a more high-traffic area it might smudge a bit. I’d love to know your thoughts!
So so awesome. I love sharpie projects!!!
xo
Daniela
Put A Bird On It
http://iputabirdonit.blogspot.com
Thanks Daniela!
I am so blown away by this DIY! That West Elm rug is one of my favorites. And your version looks so, so good! Can’t believe you did it with a marker. Really genius.
Thanks Alexis, I’m still blown away that it’s a sharpie and I think it looks even better in person 🙂
I LOVED this rug so much it was a feature in Link It or Lump It this Sunday… BUT the coolest part is how much my 6 year old nephew has taken to your rug. My sister texted me super ticked because he came in and woke her up at 5 in the morning and asked her to turn on the laptop so he could look at it again 🙂 They’ve decided to tackle this project so he can have his own DIY West Elm Sharpie rug in his room!
Oh my gosh Allison that is so awesome! I would love to see how his rug turns out and what awesome parents he has to work on a project together like that. Love it 🙂
Wow, I’ve been dreaming of having that West Elm rug for months now. I’ve looked high and low for a cheaper alternative and was just about to give up hope when I found your post! Just curious…is it still holding up?
Hi no one asked this ques bcos maybe everyone knows the answer but im curious whether this can be washed at all? It looks terrific but i have toddlers so not sire i can have a rug i cannot washed. 🙁
Wow, this is amazing! Im want to do it also, can you tell me if you had any problems with it so far?
I actually don’t have this rug anymore – but kept it for at least a year. The sharpie did fade (a sharpie paint pen would have been better) and having pets certainly didn’t help, but if you want something super budget friendly that you can upgrade later on, this is a great option! I still don’t know if I’d rather pay money for a rug my pets destroy, or spend time on one they destroy, haha. I will say that World Market does have awesome rugs, and if you catch them during a sale you can get a great deal so that’s another budget friendly option to keep in mind. I do love the process of painting rugs and being able to customize them however you want though.